Ever been walking along the beachfront, or at a farmers market and pass the mini donuts truck and get a massive craving for donuts that you can’t eat due to allergies? No, just me? This is a great recipe that makes light baked gluten free donuts. Definitely a must try recipe, and relatively quick to whip up. Makes me wonder why I haven’t made them in a few years.
I don’t think I am the only one out there that has yet to get pregnancy cravings, but breastfeeding cravings, those are a definite thing in this household! I may or may not have made several batches of these recently to curb those cravings. Even better than I remember them from before.
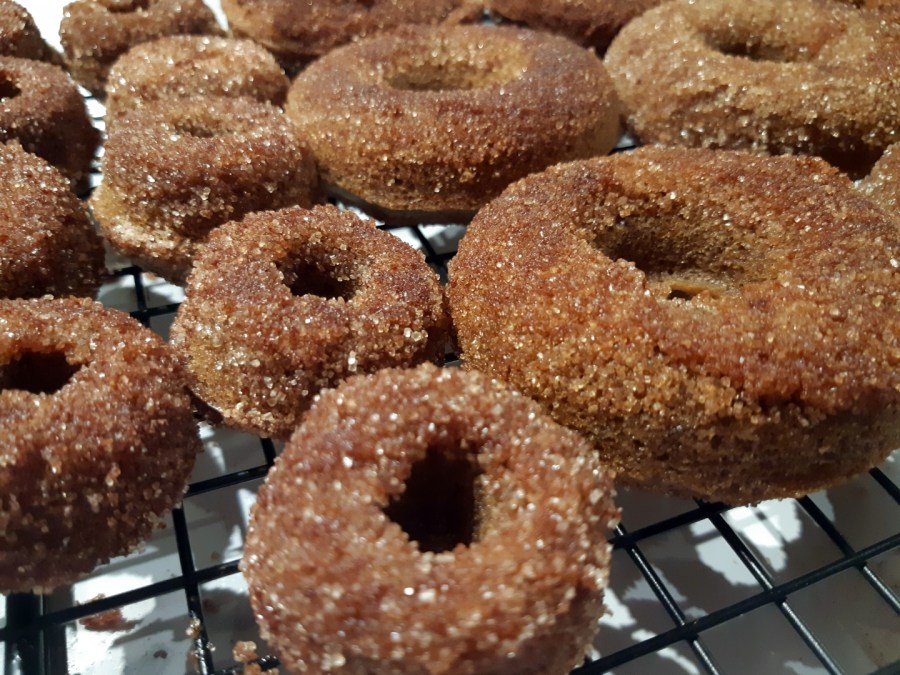
Gluten-free Cinnamon Sugar Baked Donuts
I used to make these regularly and for some strange reason I kept the recipe in my binder, unused, for several years! I recently pulled it out and make a couple new tweaks, making it better than ever.
Ingredients
Donuts:
1/4 C unsalted butter/coconut oil/vegan butter, room temperature (1)
1/4 C vegetable oil (I have used olive, coconut, and sunflower oil) (2)
1/2 C cane sugar
1/3 C brown sugar/coconut sugar (3)
2 large eggs/flax egg (allow 5 min to thicken) (4)
1 1/2 tsp vanilla (5)
2 2/3 C (320 g) gluten free all purpose flour (I use my Gluten Free All Purpose Flour)
1 1/2 tsp psyllium husk fibre/1/2 tsp xanthan gum (6)
1 1/2 tsp baking powder (or 3/8 tsp baking soda and 1 tsp apple cider vinegar) (7)
1/4 tsp baking soda
3/4 – 1 tsp ground nutmeg
2 tsp ground cinnamon
3/4 tsp salt (8)
1 C milk/milk alternative (I use coconut milk) (9)
Topping:
5 Tbsp salted butter/coconut oil/vegan butter, melted (1)
1 1/2 Tbsp cinnamon
1/2 C sugar
Directions
Donut:
- Preheat oven to 425 degrees. Grease donut pan (10)
- Using your electric mixer, cream together the butter, oil and sugars until smooth.
- Add the eggs, vanilla and apple cider vinegar (if using), beat until smooth.
- In a small bowl whisk together the flour, baking powder (or baking soda if using), baking soda, nutmeg, cinnamon, and salt.
- Alternate adding the flour mixture and the milk to the butter mixture, beginning and ending with flour. Mix on low until just combined.
- Scoop batter into a ziploc bag or a piping bag, cut off the tip/corner and begin piping the batter into the cavities of the donut pan, fill almost flush to the top of the pan.
- Bake at 425 degrees for 7-10 minutes until pale golden brown and toothpick comes out clean.
- Remove from the oven, let sit for 2-3 minutes in the pan Turn over and cool on a cooling rack.
- Repeat with remaining batter.
- While cooling, make the topping.
Topping:
- Melt the butter/alternative in a small bowl.
- In another small bowl whisk together the cinnamon and sugar.
- Take each cooled donut, dunk top half into melted butter and then into the cinnamon sugar mix. Place on cooling rack or tray to set, enjoy.
- Store in an airtight container at room temperature for 2-3 days. I haven’t tried freezing them yet, they never make it that far.
NOTES:
(1) Butter: Dairy & Corn Allergy – Depending on allergies use whatever butter you need. There are several options: MELT, Earth Balance, Miyoko’s, coconut oil, goat butter). Beware of salt in butter if corn allergic (look for sea salt/unsalted), also be careful of the diet of the cows. Many of vegan butters have corn derivatives.
(2) Vegetable oil: Corn Allergy – Don’t use “vegetable oil” as it can be corn or soy oil. Canola oil is one of the worst oils for cross contamination with corn. I usually use grapeseed oil. Olive oil isn’t always 100% olive oil either, so if you are sensitive, be careful.
(3) Brown Sugar: Corn Allergy – depending on sensitivity, you may need to make your own with safe molasses and sugar. Alternatives include coconut palm sugar.
(4) Egg/Replacer: Corn allergy – Eggs are washed with a commercial cleaner that is full of corn products. The egg shells are porous and absorb the cleaner, so many with corn allergies have issues with eggs. Less common is to have issues with eggs due to what the chickens are eating. I have found that many of the egg replacers out there use corn starch, so beware which one you buy. Bob’s Red Mill works as a great replacer, however it has a lot of cross contamination and isn’t recommended at all with corn allergies. You could also use a flax egg as an alternative.
(5) Vanilla: Corn Allergy – Vanilla is made with alcohol, often corn, you may need to make your own
(6) Xanthan Gum: Corn Allergy – xanthan gum is iffy with corn allergies due to how they make it. We made the switch to psyllium husk fibre in our house.
(7) Baking Powder: Corn & Grape Allergy – Baking powder is not corn free. Find corn-free if need be. Cream of tartar is made from grapes, if you have a grape allergy; you just need 1/4 of powder for baking soda and remainder in apple cider vinegar
(8) Salt: Corn Allergy – Many that are allergic to corn are sensitive to iodized salt as corn is used in the processing. Sea salt is better, but some are still quite sensitive and require brand specific salt.
(9) Coconut Milk: Corn allergy – ensure coconut milk is additive free
(10) Grease: Corn & Soy Allergy – PAM is full of contaminated corn oils and soy oil. I use safe oil & grease with my hands or a silicone brush. You can buy oil mister bottles and fill with your own safe oil as well.