I have spent so much time and energy making terrible loaves of bread by bloggers that state it is the best loaf of bread they have had in years. None of them were good. Until I found this recipe. I tweaked it so much, it isn’t really the original recipe anymore. Part of the problem I am sure is my oven, so you will need to figure out your timing cause mine takes way longer to bake fully than any other bread recipe I have found.

So if you find your bread collapsing after pulling it out of the oven, try leaving it in longer. Or using a thermometer to track your bread to take it out at the right time.
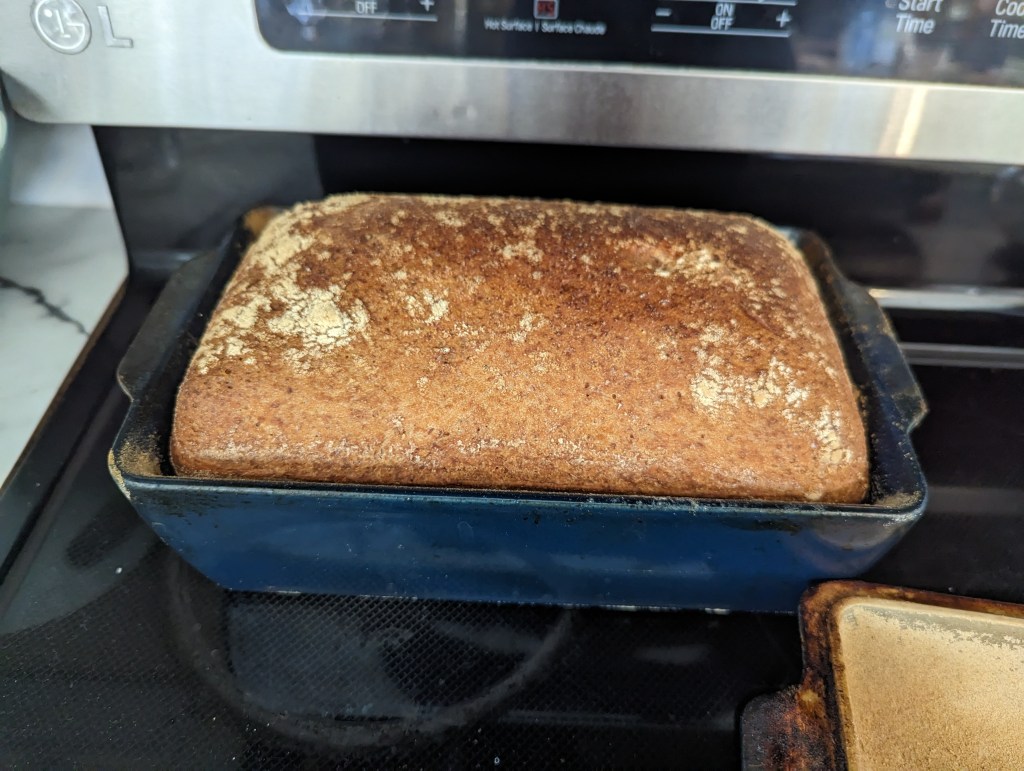
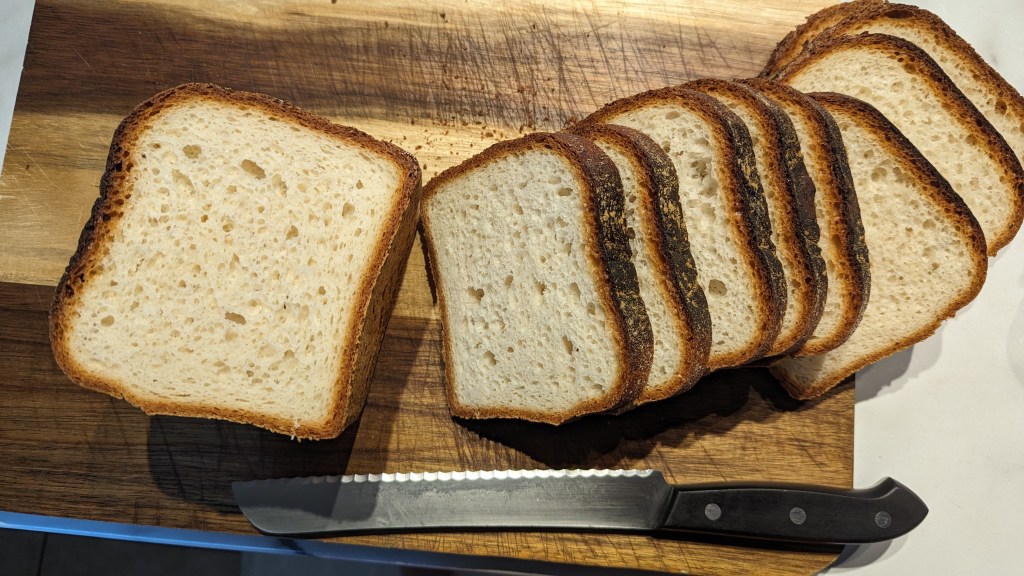
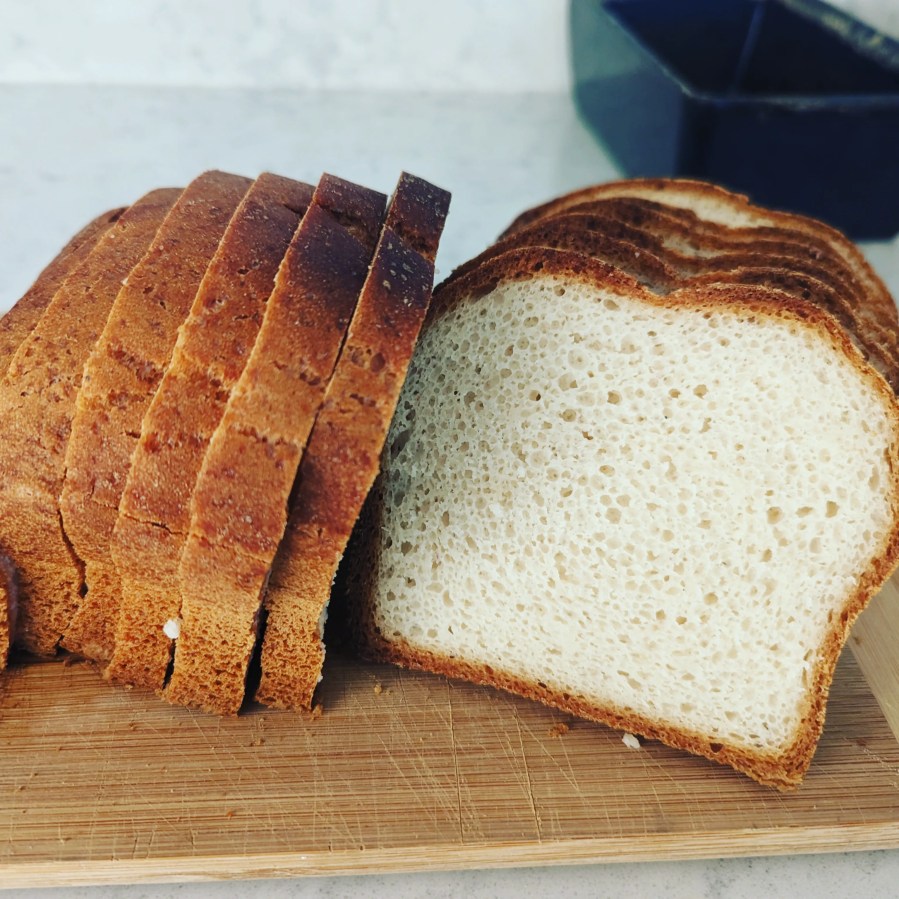
Gluten Free Sandwich Bread
Delicious Gluten Free Sandwich Bread that works great for toasting or french toast. May take some tweaking to make it perfect, but when you do, you won’t look at another gluten free loaf of bread the same.
Ingredients
Dry Mix
150 grams White Rice Flour
95 grams Brown Rice Flour
123 grams Arrowroot Starch
95 grams Tapioca Starch (Flour)
1 1/2 tsp Salt
25 grams Psyllium Husk Powder
Wet Mix
500 ml warm water
2 Tbsp Sugar
7-8 grams Active Dry Yeast
3 Large Egg Whites (lightly whisked) (1)
2 Tbsp Melted Butter (50g) or Oil
1 tsp Apple Cider Vinegar or Rice Vinegar
Directions
- In a mixing bowl add the dry mix ingredients and mix well together.
- In a separate bowl dissolve the sugar in the warm water, mix in the yeast and let foam for 10 min
- Add the butter/oil, egg white, vinegar and yeast mixture to the flour.
- Beat with the paddle attachment in your stand mixer for 5 min, this is important to let the flours and psyllium husk fibre hydrate.
IF USING: EMILE HENRY BREAD LOAF BAKER - I use the Emile Henry bread loaf baker. I lightly oil the pan and dust in brown rice flour.
- Using a spatula, ease your mix into the pan. Shape and smooth with the back of a Tablespoon dipped in water regularly to get a nice smooth top to your loaf.
- Leave in the pan for about an hour to proof, or until doubled in volume.
- Preheat oven to 425F
- Place the pan in the center of the oven (with the lid on) for 70-95 minutes or until crispy and golden. Test the temperature of your bread (should be 208-212F) to be cooked properly.
- Remove Loaf baker from the oven, allow to cool with the lid on for at least 15 minutes to allow the crust to crips and the bread to cool slowly.
- Allow to go completely cold before cutting.
IF USING A PULLMAN TIN/METAL LOAF PAN
- If using a metal loaf pan, line with parchment paper to prevent leaking and sticking. Pullman tin (21.5×12.3×11.4cm) is the recommended pan for this loaf. You want a 2 lb bread loaf pan that has higher sides to prevent the bread from collapsing. Use without a lid.
- Using a spatula, ease your mix into the pan. Shape and smooth with the back of a Tablespoon dipped in water regularly to get a nice smooth top to your loaf.
- Leave in the pan for about an hour to proof, or until doubled in volume.
- Preheat oven to 425F
- Place the pan in the center of the oven for 40-50 minutes or until crispy and golden. As you put it into the oven, tip a small cup of boiling water into a tray in the bottom of your oven to create a steamy environment.
- If it is browning too quickly, cover with some foil around 35 minutes. Turn the oven down to 400F for the final 15 minutes. Test the temperature of your bread (should be 208-212F) to be cooked properly.
- Pop the loaf, out of the tin, into the hot turned off oven for up to 15 minutes to let the crust crisp and the bread to cool slowly
- Allow to go completely cold before cutting.
Notes:
(1) Eggs – Large eggs = 2 oz per egg on average